Showing posts with label swatch. Show all posts

Urban Decay Black Market Eyeliners

Tuesday, 4 February 2014

An easy way to brighten up and change out the regular eye look that you wear day in, day out is to consider changing your default colour of eyeliner for something else.
Cobalt blue water lines may frighten you a little, but changing a classic black for a maple syrup brown that brings out the warmth in your eyes, 
or for a steel grey to soften the look, 
an inky blue to contrast with brown eyes 
or a khaki green to created subtle twist on a brown neutral eyeshadow

So.. I'm sure that you can tell where I'm going with this, I highly recommend eye colours, lots of them, the more the merrier because it's a great way to change everything without really having to do anything different.
I already have a supply of browns, bronzes, blacks,whites and greys but none Urban Decay and I had heard terrific things about the staying power of UDs so when I saw a set of Black Market liners travel size in a variety of colours I just couldn't resist.
Here is the 411 with swatches, names and up close and personals.

From left to right:
Apathy - Glittery grassy green
Riot- Aubergine purple
West- Bronzey brown
Ink- Deep blue
Black Market- Satin black
Desperation - Steely gray
 

The consistency of these liners is second to none, beautiful and creamy without smudging, pigmented without movingout of place. These eyeliners are life proof, these swatches did not come off until I got into the shower and then I had to scrub and basically exfoliate my skin off to get rid of the pigment.

But I did notice that as the swatches wore on, one eyeliner became indistguinishable from the other as far as colour is concerned, they all began to look like various shades of grey.

I jsut want to point out at this point that this was a travel set, so they are considerably smaller than your regular eyeliner:


Aaaaand, they do not have a 'twist up' function, so once that nib is gone, it is goooone. Not a whole lot of product for your buck


I got mine from Beauty Bay for £18.20, 25% off! Yippee!

Naked 1 vs. Naked 2 vs. Naked 3 Urban Decay Palette

Wednesday, 15 January 2014

Whew, this is going to be a long side by side comparison, rammed full of photographs and descriptions- so grab yourself a warm drink and get into your comfies before you continue reading.


The Naked palettes are a 'cult' favourite product that cast and addictive spell on anyone who buys them to convince them that they need the next one, and the next one.


How many shades of neutral are there? Really?

Well, a lot- it would seem, and maybe there are even more yet to be invented, or reinvented by Urban Decay.

A little outline of the palettes:

Naked/ The Original Naked/ Naked 1


This palette is full of rich deep warm browns that are mostly shimmer. The palette works in a gradient from the light colours to the deepest darkest
# of Matte colours: 2
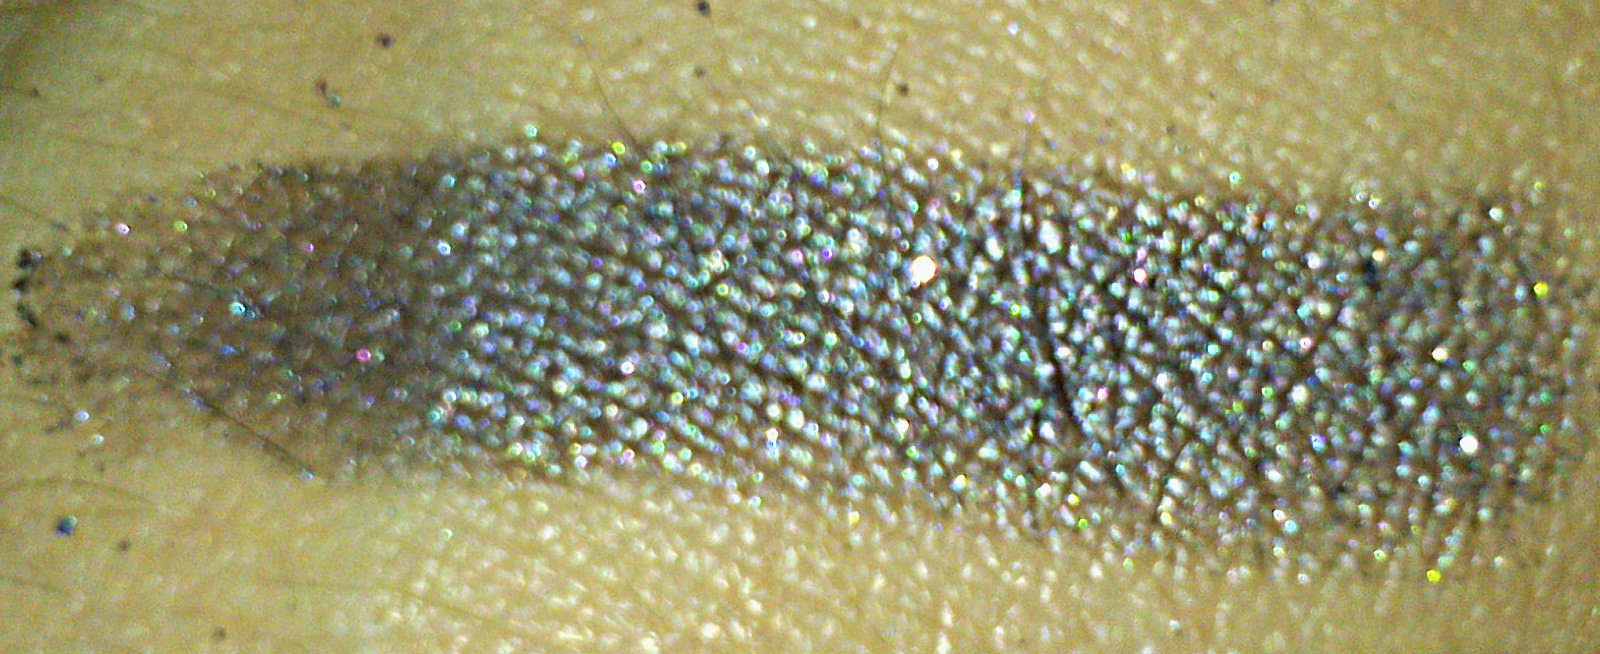
Most original shade: Gunmetal (Blue-Grey on the far right)


What's great about the palette:
A whole spectrum of very high quality, rich buttery eyeshadows.
It fills in every gap in your browns and is perfectly portable
There are endless combinations
It comes with a reasonable quality brush & mini primer potion which most people love (I am not one of those people but that's another story)

This lets the Naked #1 down:
After a while one shimmery brown, becomes another shimmery brown and once placed on the eye it's tricky to distinguish one from the other.The majority of shimmer shades make it less day-to-day wearable for those who do not like wearing shimmer in the day time, there are only so many ways to use the matte colours alone
The case is a velvet that gets unbearably dirty from eyeshadow or general powder fall out
The mirror is fairly dinky and does not make full use of the lid space

The final word:
A lot of people claim that this is a palette best for 'brown eyed girls' I don't agree with this, I am not really one to follow that 'this' is for blue eyes and 'this' is for brown eyes- I really think that colours are transferable universally across all eye colours. The only person who I would say that this palette is less suitable for is mature skin, there are a lot of shimmers which can be less forgiving if your eyelids are not as perky as they once were- also, it tends to be mature women who shy away from wearing shimmer eyeshadow in the day time which limits the looks that the palette can give you so things may get repetitive quickly.

Naked 2


This palette is crammed with cool toned neutrals. The palette is a mix of creams, browns, greys, bronzes, silvers and blacks
# of Matte colours: 3
Most original shade: YDK (Purple sparkle, 3rd from the right)


What's great about the palette:
This palette gives a great deal of variety as it dips into the golds, pinks, silvers and purples as well as having a true universal staple to take anything from a neutral to dramatic look which is an outstanding quality, rich, buttery matte black in Blackout. The packaging is a beautiful steely cool metal, that is hygienic, a nice neat clasp closure and a generously sized mirrors

This lets the Naked #2 down:
The double ended brush that comes with the product is not great, the supposedly fluffy blending brush isn't as dense as it could be. Also, there is what I consider the worst thing that UD could have done through including a repeat colour, there is 'Half Baked' in the Naked 1 and Naked 2 palette. The colour itself is lovely, but I think that to not come up with an original shade is borderline laziness.

The final word:
This is without a doubt the most versatile palette for all tastes, this contains something for every taste, light natural looks, darker daring looks, bridal looks, shimmer looks, matte looks. If you're someone that likes it all, likes experimentation, choice and variety then there is nothing that you won't love about this palette of exquisite colours


Naked 3


This palette is a porcelain girls dream, a whole palette tinted with pink. I know that it's easy to run away screaming when I say pink eye shadows with visions of having bruised eye sockets or eyes that look riddled with infection. But this palette is really nothing like that, and is a pleasant surprise to skeptics, and just as good as anticipated by the rest of us. It managed to achieve this by combining rose colours with just a hue of brown to tone them in the right way. Pink eye shadows can be a challenge to pull of, but these are on a scale of their own, granted I think that this would suit fair skinned girls, but there is something here for absolutely everyone of all ages. If you are a makeup artist or considering getting into bridal makeup then this is an essential addition to your kit, this is a natural-beauty brides fantasy come true, gorgeous romantic colours that enhance and compliment the face.

# of Matte colours: 3
Most original shade: Blackheart (colour on the far right)


What's great about the palette:
The Naked 3 is consistent in the theme that this is without a doubt a rose gold infused palette, and there's not many people who haven't indulged in that trend. This palette normalizes pinks, makes them accessible and less frightening. It's also a wonderful transitional palette into the warmer months. Every single colour is beautiful and wearable, like sweet, indulgent little chunks of chocolate in a gorgeous rose gold case with all the greatness of the Naked 2 palette (large mirror, sturdy case etc) but with some pleating detail on the packaging.

This lets the Naked #3 down:
There are some dupes between the Naked 3 and it's older sisters including:
Naked #1 Darkhorse and Naked #3 Darkside
Naked #2 Foxy and Naked #3 Strange
Naked #2 Tease and Naked#3 Nooner

The final word:
If you are a neutral girl, that has exhausted the browns and bronzes and you're looking for a fresh twist, then the Naked 3 is astounding at filling that little void. The concept of the palette is romantic and the first of it's kind to really run with this theme but some of the colours are dupe able. If you are torn between the Naked 1 and Naked 2 then I'd say go for the Naked 3, to me it is like the best of them both married together with a girly twist.

Verdict:
My most used is the Naked 2, but the most original in my collection is the Naked 3. I only tend to pull out the Naked 1 for the summertime but this is perhaps an odd force of habit that I have imposed upon myself.
If in doubt, follow the packaging to indicate what is inside


Bridesmaid Summer Wedding Manicure

Monday, 5 August 2013

As my sisters wedding is fast approaching, it's about time I tied all those little loose ends of jobs together. A few days before the wedding like today, made it the perfect day to test out what colour to wear on my nails, I've finally settled on Princesses Rule! By OPI
My advice when deciding what polish to wear is to do a little trial run, if it's between two colours, paint a different colour on each hand then hold the (dry) nails against the outfit that you are wearing to see which colour looks best!
I am wearing a bridesmaid dress that is a block colour, and I've decided these look the most feminine, and understatedly pretty when held against the dress!


It looks like subtle pink sparkle with one coat, but I ended up building it up to three coats to create a more opaque glitter finish. As for lasting, it leaves a lot to be desired, it will only look good for about one day and dents easily too. Here I've worn the colour for three days and the tops are all chipped and that was with a strengthening top coat, so be aware of that going into this. However, it looked neat and fresh for all of one day which is how long weddings last!

Bad Face Base Good Face Base

Sunday, 28 July 2013

It is true what they say, and by 'they' I mean the beauty philosophers of ancient Greece... All Makeup Primers/ Bases are not made equal, as I expensively discovered.

My sisters wedding is fast approaching and I've taken my role as Maid Of Honour rather seriously up until this point, and how I look on the day is a rather important factor. Lots of lucky girls can take for granted that they will look lovely but my blotched and pimpled and scarred face makes things... a little more challenging. You can see the full extent of my skin at the start of any makeup video where I often do a quick before and after.


So you can imagine my delight when in Boots I came across the Smashbox Photo Finish Color Correcting Adjust Foundation Primer. It was hard to miss it as it is pea green and stands out in its clear tube. I picked up the sample and thought 'well this looks interesting, I wonder if it will clear up my redness' As I already had a face full of makeup on I decided a blob over my noticeable freckle on my right hand would have to do, I'd see how it covered that up.


Truth be told I didn't notice a difference in the freckles colour, it didn't look camouflaged to me, even with a bit of foundation sample over the top. However, the wonderful texture of this product had captured my heart. It was creamy but absorbed into the skin wonderfully, which is no small task with my un-penetrable oily skin. While I nearly fell over backwards at paying £25 for the full sized, i spotted the mini size for a fairly reasonable £12.50 and I decided it was more than worth a shot if it would do the trick.
After cleansing my skin, I applied a generous amount and I have to say I am very let down. While it created a nice base to put my makeup over, a £4 primer would do the same. I bought if for its colour theory properties to cancel out my redness, but this barely even touched the redness. Nor did I notice my makeup lasting particularly longer.
The final push to invest in this product unfortunately came from watching a YouTube video that was in full support of these primers and made a special mention to the wonderfulness of the green primer. I feel let down and slightly robbed.
It is by no means a bad product and the texture is pleasant between my fingers without being greasy but this was probably a product made for the 'so-called' acne which consists of the occasional, single red chin spot - not a face full of one breakout.

Mac Nude on Board Pro Longwear Bronzing powder

Monday, 8 July 2013

I picked up a little treat from the MAC store and wanted to share with you my thoughts on it. I love my MAC Matte Bronze powder dearly but it's on it's last legs, the poor thing, so I decided a replacement would be in order. The girl in MAC really pushed this product into the palm of my hand and as they never ever normally do that I decided that well, it must be really really good.


It's a lighter colour bronzer than I normally go for, I like a dark bronzer, some might probably say too dark as I am of a fair complexion, but it's what I like as my face is always in need of a lot of contouring. Anywho, my initial thoughts were good, it's a medium tan brown colour in the pan and is not totally matte, is has a subtle sheen to it. This is all new to me, I'm usually a girl that loves matte everything, the matter the better!


The next thing I loved was the texture, it's very buttery and smooth to the touch, and the colour payoff is in no way chalky, it almost sits like a cream on the skin, despite being a powder. The above swatch shows one swipe in the pan and across the inside of my forearm, to give you an idea of the colour tone, it has been in no way edited.


As for uses, I would say that to use as a bronzer, it does need to be built up, luckily it is very buildable but it depends if you are willing to put that little bit more effort in, or would you prefer to jut buy a darker shade. On the other hand, if you are fair (like I am) and especially if you have yellow undertones to your skin (like I do not have) then this is absolutely ideal for all that subtle contouring, so that people will think you just have wonderfully high sat cheekbones and a beautiful slim nose, and perfect shaped face - all of these things I need! Finally, it's part of the pro longwear collection, so fading won't be an issue, at least not for the first six hours of wear and forget about the need for touch ups.

Maybelline Color Tattoo Gold Bronze Rose-Gold Taupe ~ Swatches

Sunday, 26 May 2013

Superdrug had 3 for 2 across all of it's beauty lines, so even though I had a less than magnificent experience with my first Color Tattoo in Eternal Gold, I decided I wouldn't give up on them as a concept altogether.
I got the 'On and On Bronze' which is called 'Bad to the Bronze' outside Europe I think, Pink Gold and Permanent Taupe.


They look so pretty all stashed side by side, I like how there is detailing on both sides of the container so whether you store them lid up or lid down you can still see what they are and the shades inside.

You can see all the beautiful colours, they're all shimmery except for Permanent Taupe and can be used on top of an eyeshadow base but I think they work just fine as a base in their own right for other eye colours, or you can use them simply as a cream eyeshadow.

Here I've swatched them down the inside of my arm, no primer just on bare skin


At the top is Permanent taupe which was the most stubborn colour to remove from my arm, it took around three washes which bodes well because my eyelids can get oily shifting my eye makeup throughout the day.
Next down is Pink Gold which is my favourite colour based on how gorgeous it is, however it was similar to Eternal Gold to swatch which you may have rad in my previous review that I did not especially like as I felt it wasn't that pigmented and kind of flaky.
Next is Eternal Gold which is clearly the weakest of the swatches. It doesn't have the gorgeous craemy consistency of Permanent Taupe.
Finally, On and On Bronze which is a warmer version of Permanent Taupe and is a perfect every day colour.

I love how all swatched down my arm they look like ice cream colours, I can't wait to create some beautiful looks for you guys using these!


Starting the week off right!

Monday, 20 May 2013

Here begins the start of the last week at University!
It's a very sad feeling but I still have a final exam to get through tomorrow before I can be completely free.
But here arrived a little magic treat pick-me-up to help set the week off right!


It is the Stila Eyeshadow in shade Kitten.
I'd heard a lot about this beautiful colour an I wasn't disappointed. It's beautiful and wonderfully creamy, maybe a bit too creamy, I'd barely pressed the pan and I've already put a dent in it, you can see it on the far right of the pan in the middle picture.
It's paler than the photos would have you believe, I wouldn't describe it as a gold colour but a cross between cream and champagne.
I really love it and can't wait to use it properly!

First impressions: Maybelline Colour Tattoo 24 Hour Eternal Gold

Saturday, 4 May 2013

I'd heard a lot of great things about the Maybelline Colour Tattoos and I've wanted the rose gold one for a while but I'm yet to see it anywhere! In the meantime I picked up the Eternal Gold shade and was super excited to use this as an eyeshadow base to add some more depth to any gold colour I put over the top. I got the product home and applied some straight to the lid and I wasn't blown away immediately. The consistency felt creamy but when I applied it with my finger it looked slightly flaky, chunky and downright gappy. I kept trying to build it up and build it up. But it began to just look tacky rather than like elegant gold, more like a childrens face paint kind of makeup.
Hmmm..


I decided that the fault must obviously be with me, everyone loved these things, surely I wouldn't be the only one to not love them?
The next time I tried it out, I was hurredly applying some eye makeup before heading out for the night, I felt like doing a gold based look so this time I applied a paint pot, then the colour tattoo. The same effect happened all over again, gappy, tacky and looking like I'd applied it with a mascara wand (if that makes sense?) it just wasn't a smooth texture to it at all.
I tried to rectify it by applying a gold shadow over the top but it wasn't that much use. I then just tried my hardest to cover it up using a matte black from my Sleek palette!


Here's a swatch on the back of my hand, I think you can see the flakiness of it. 
I think I got away with it on my eyes, but It's not a look I want to take a picture of and remember. Now I'm scared to try this product again, are all the colours like this???

I'm thankful I didn't use this product in my 'All that Glitters' makeup tutorial that I uploaded yesterday because I think the look was better off without it!