Showing posts with label makeup. Show all posts

The real easy real cheap makeup brush DEEP CLEANSE

Friday, 5 June 2015


As makeup tools get fancier and makeup becomes longer lasting, companies have realised more than ever a need for a great makeup brush cleaner that will get rid of heavy stains and eliminate bacteria for the everyday makeup wearer. While I am as thrilled as most by different cleaning tools and contraptions we should first identify the difference between a spot clean and a deep clean and be honest to ourselves when a deep clean is calling.

It's simply a matter that takes a long time, especially if you have a sizable collection of brushes because you have to be meticulous with everyone, it also inevitably is followed by cleaning the bathroom sink, since that too will be filthy after every brush deep clean.


Today I am here to cut out the nonsense and to tell you the easiest, cheapest method around with 1 product that you can get anywhere, yes anywhere (did I tell you that I'm living in China right now?)

Lets get started-

1. Gather all dirty brushes from far and wide
the brush is dirty when the fibers are coloured any colour other than the colour of brush hairs, if they've been used at least once, or if they've been sitting around for sometime without being used (dust is bad too ya'no)


2.Squirt a generous dollop of Johnsons Baby Shampoo into a cup (I use my brush holder because it cleans that at the same time!)
actually, any gentle cleanser will work, certainly no cleaning products you'd use in your house, only ones you would use on your skin- add more cleaning product to the cup as you need it


3.Hold the brush under a warm running tap


4. Dunk the brush head into the dollop of shampoo

5.Work those fibres between your fingers
be firm enough to get in the nooks and between the fibres, but gentle enough not to pull out a single hair if you can help it

6.Rinse

7. Repeat until your hand is raw from cleaning or you have no brushes left to clean (whichever is first)


BONUS BEAUTY BLENDER STEP
It's exactly the same principle except you'll need to dunk and drown that damn sponge in more baby shampoo than you imagine. Work it into the sponge, rinse and repeat until that water runs out the sponge clear. 
Remember: The first squeeze to extract the initial gunk is the most satisfying


8. Tuck your brushes into their little towel bed
I've made a pillow on one side for the handles that is raised so that the water runs out the brush
If your brush is double ended just lay it flat


Leave overnight to dry and thank me, and yourself in the morning !

A moments silence for the brush that didn't make it through this clean today. My Models Own Pencil brush, and he'll be replaced back in the UK

New Video: Summer Makeup Tutorial for Acne

Thursday, 29 May 2014

It has been longer than I'd care to admit but a new video has just landed freshly from the bakery of my imagination!

It's a very simple makeup tutorial for the summertime, here I'm using a BB cream which I never really got on board with until now. This one has salicylic acid which was the primary reason that I got it. I can't say that I've noticed it helping my skin, but similarly, I haven't noticed it breaking me out either.

 The standard before shot, the main problematic areas are uneven texture and redness around the chin, by the temples and the forehead.
 As a BB cream it hasn't done a bad job of concealing most of the problems, but I of course had some help from my best friend concealer! I use the heavy stuff by Kryolan that comes in a colour wheel.


Eyeshadow courtesy of the Naked 3 palette by Urban Decay!
For step by step, keep watching:


Pretty in Pink Makeup Tutorial Urban Decay Naked Palette 3

Sunday, 16 February 2014

It's such a myth that pink eye shadows are tricky to wear, paired with the right colours and the right amount of blending it is such a gem to have in your arsenal!

This is my most recent look using pinks as a base


A little mini breakdown of what happened is as follows:
1.Eyeshadow base
2. Apply a matte white shade all over the lid
3. Apply a bronze pigment around the outer eye and the outer half of the crease
4. Apply a mild baby matte pink on the middle part of the eye
5. Run a white eyeshadow pencil along the inner corner of the eyes and blend with your finger
6. Apply the matte white shadow on the brow bone
7. Run a white eyeliner along the waterline
8. Use a brown gel liner along the upper lash line and the outer third of the lower lash line
9. Apply mascara
10. A slick of cute pink gloss

You are done!

If you are looking for a little more detail, and 3 and a half minutes - or so of fun, watch the tutorial here!


Simple & Elegant Valentines Day Makeup Tutorial

Friday, 31 January 2014

Smokey eyes and glitter eyeliner are not always the best route to get the love of your life to swoon for you first thing in the morning, but here I present to you the effortless, simple Valentines day look- it's beautiful and neutral and easily dupe-able whether you have the Naked 1 palette or not!
It takes you from day to night without looking over the top for a light lunch, a picnic, the cinema or a late dinner without looking either overdressed or underdressed.
It's low maintenance in terms of upkeep because of the neutral lips!
(Also no one likes sticky lipgloss kisses...)


Full Face coverage - Before and After

Tuesday, 21 January 2014

It's true, all foundations are not made equal, and it's even more true that you do get what you pay for. If I had to suggest one area to 'splurge' in your makeup bag over all the others- I would hands down say go in big on your foundation and loosen the purse strings a little. Eyeliners and blushes, lipsticks and mascara are very tricky to distinguish the £6 from the £16 or the £26! But the foundation is the foundation for your makeup, your face and your look. The foundation is out under the most pressure and has the toughest job to do, create a seamless, flawless natural looking canvas that can withstand it all. Cheap foundations, like the cheap foundation on a house, may look okay at first but the first sign of a grey cloud it crumbles and melts away.

I have dabbled back and fourth with all sorts of foundation and concealer combinations but often return to the Revlon Colorstay in the oily combination skin formula and the Mac Studio Sculpt concealer.
However, not wanting to miss out on anything better out there I am currently using:

Mac Studio Fix Fluid in NC15


Kryolan Dermacolor Wheel Rainbow Circle


The proof, as they say, is in the pudding, and this is the completely unedited, as-it-is, result that this little combination gives me!

The foundation I have gone back and fourth with, it's full coverage with a matte finish and I wear shade NC15 to even out my complexion, with the Kryolan colour wheel I use all of them, mostly a combination of the two palest colours for under my eyes and the rest I darken according to the contours of my face. The formula of the concealers are almost on the dry side as they are very thick, and feel like face paint. Although on the skin they do not look cakey like you might imagine face to paint to look, but it is the fullest coverage that I have ever gotten from a concealer and super resiliant to wear.

Sometimes straying from what you're used to is a good thing!

Soft and Romantic Valentines Day Makeup Tutorial Urban Decay Naked Palette 3

Saturday, 18 January 2014

You're thinking that Valentines day is approaching and you want to look cute for the day! Well I have you covered, today I uploaded a super sweet Valentines Day Makeup tutorial that is effortlessly beautiful and chic! Panic over! For this I used my beloved Urban Decay Naked 3 palette, and today it makes its debut to my YouTube, although it's had a special place in my heart for a while now.


  The Naked palettes aren't the cheapest palette available, so check to yesterdays post for a super detailed run down on what the palettes are about, what one is best for you and whether they are worth it.


I couldn't resist this tacky photograph effect! Love heart confetti all over my face, what could be better?

New video makeup tutorial: Urban Decay Naked 2 Palette Smoulder Look

Tuesday, 7 January 2014

Who doesn't love simple great looks at your disposal to whip on time and time again that look just great, are simple and fool proof?

Here is another of those classic looks that use a few colours (dupe-able) to create something striking, it's a simple case of dark colour on the corners of the eyes and the crease, with a paler colour in the center of the eye lid, the real key is blending blending blending, and a little bit of adding the dark colour at a time, it's much harder to 'blend away' dark colours once you've applied too much, so keep a light and gentle hand and take your time at first!


Yesterday my Naked 3 palette showed up, and I got to have a little play around, so my next few tutorials may have a little something on that, I'm also contemplating getting a good quality microphone to begin creating voice overs to some or all of my videos, I'm not too savvy with the editing though, so it may be a step too far for me!?

It's not too late!

Sunday, 22 December 2013

...to look fabulous on Christmas morning!

My last makeup tutorial before Christmas, and it has certainly led me to rediscover the beauty of my Naked Palette #1

It's all gold and bronzes and understatedly glamorous with a subtle eyeliner flick and diluted metallics!

I use a combination of shimmer and matte colours and finish off my lining my upper and lower waterlines with an eye kohl by Mac in Smoulder (a deep, dark black)

So if you're stuck thinking I just don't know 'what' to do on Christmas day then this is a safe bet to look glamorous and 'put together' when the eyes do not take any more than five minutes to throw on.


New Video: Grungy 'slept in' eyeliner makeup tutorial!

Thursday, 12 December 2013

Not living the 'Rock and Roll' lifestyle but wish that you were?
Want it to look like you were out partying all night with a glass of low inhibitions?
Girls, wish that you could wear 'the walk of shame' every day?


If that sounds like you, then why not try the grungy eye makeup look!

For whatever reason, this look has really caught on so I thought that I would share it with you guys


I created a video that teaches you how to master that in under a minute!


I am more a fan of 'polished' looks myself, but I figured that there is no harm in trying new things and sharing new tips and trick with you.


I used Macs eyeliner in 'Smoulder' which is a really smudgy formula so pretty much ideal for this kind of thing- I thought I would mix it up a little this week to take a little break from all my glitzy gold holiday makeup tutorials!

Simple Subtle Smokey Eye Makeup Tutorial

Friday, 6 December 2013

Now that it gets darker a little earlier, and it feels acceptable to pull on warm, dark knits - it's also a time that we can get away with wearing darker makeup in the day time!

Here, I present to you the subtle smokey eye, something totally simple and easy, with a wintery bite to it.


If you're looking to update your look for winter- but feel that you don't know where to start, cool tone brown eye shadows look good on everyone!

Urban Decay Festive Gold Sparkle Makeup Tutorial!

Wednesday, 20 November 2013

Woohoo,
Getting my Christmas groove on because lets face it, winter makeup is about 100 x more fun than summer makeup which is quite often 'no' makeup makeup looks (I have a few on my channel, just in case you were interested...)
I've created a very very glittery eye, golden glitters for that matter- and added some brown glitter and brown eyeliner accents to keep it all very warm.


On my lips I am wearing Mac lip liners in Cherry and Chestnut, I only ever use these liners together- No exceptions! It creates a velvet lip look with a whole lot of festive POP
There's plenty more where that came from...


Zombie Simple Video Makeup Tutorial

Thursday, 31 October 2013

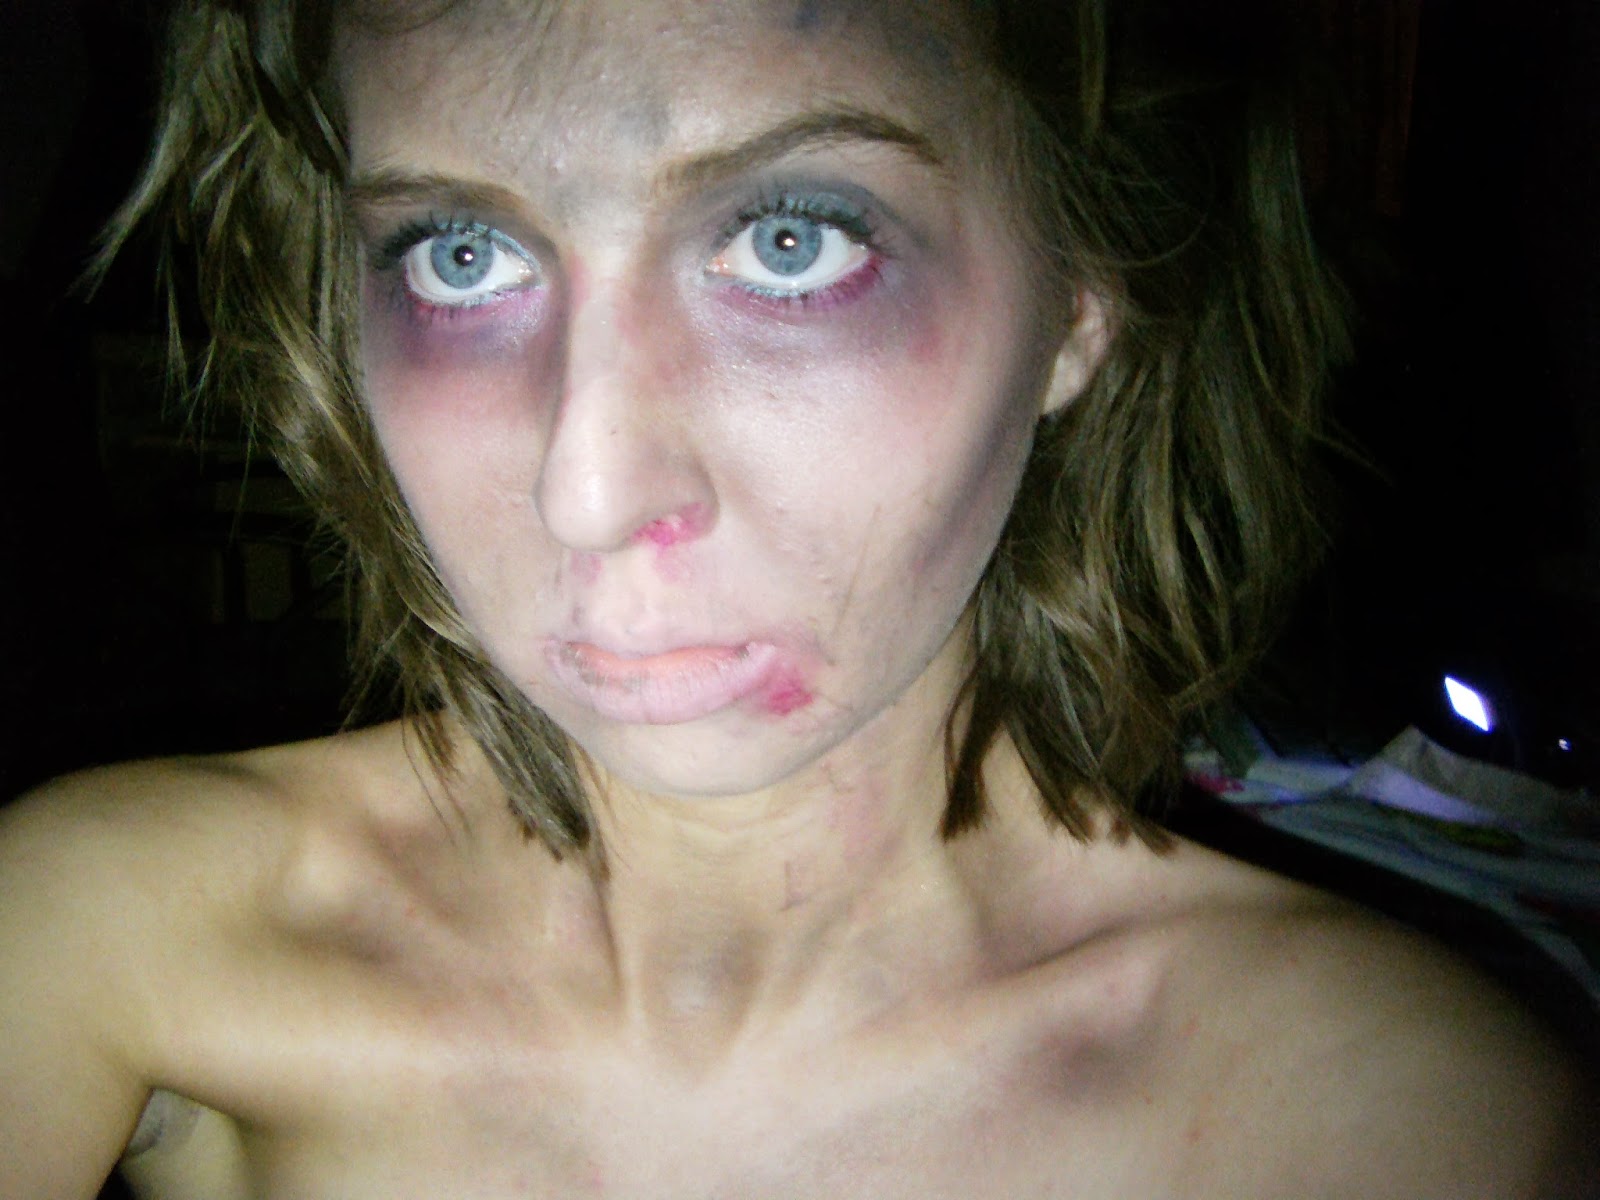
It's very easy to be tricked into believing that to dress up in horror style makeup then specialist makeup will be needed, even if it is just face paint and some fake blood.
Well, I am here to tell you that is false! I can prove it!
There is no need to spend the money on these things only for them to dry up in 2 months and never to be used again.


So if you are:
-Last minute on costume ideas

-Want a scary zombie look without the scary price tag

then I have a video just for you!

Some comments have said that I resemble more a person abusing illegal substances... which is fine, I suppose, that is equally horrifying to me I suppose!


This delightful look follows straight on from the previous video... where I transform into that china doll that your grandmother owns that makes you feel uncomfortable. If you want to start at the very beginning then take a look at this video first:


Halloween Makeup Tutorial Easy Creepy Plastic Barbie Princess China Doll

Friday, 18 October 2013

There's a whole lot of directions that this look can take you,

You want to be a Barbie? Check!

You want to be a Pageant Queen? Check!

You want to be a fairy princess? Check

You want to be a China doll? Check, check

A major contributing factor besides the makeup is the creepy expression that you put with it. That can make it all the more horrifying.

If you're looking for a costume that is eerie without being gory or needing any specialist products then this is a look to consider. You can still look yourself, and glamorous but just a little more 'frozen in time' and maybe disturbed.


If this is a little on the tame side for you, then watch until the end for a little hint of what's coming next week...then think of this as the part 1 transformation video to something altogether more disturbing...

New video: Pumpkin Spice- New Room - New haircut!

Saturday, 12 October 2013

So I cut off all my hair and moved house, all in under twleve days!
It's been crazy here, as I was utterly ecstatic to cut my hair off, I had only been growing it out for 'the' wedding, and now It's over I'm delighted to have my short hair back, I am just not a long haired gal, it's too fussy, too much and too bland for me. I was practically giddy in the hairdressers chair and giggling with excitement when she did the first big 'chop' to hear the snip and see the chunk of hair dropping to the floor.
 The very next day...
I moved back to University, as the Summer is officially over!
I am thrilled to be back in the city that I love, living in a new house with my nearest and dearest friends.
My room has a lot that needs doing to it before it will be 'my' room but it's a working progress and I'm getting there.

Here's my new vid of the rest of the academic year, You didn't think I'd forget about you, did you?

I called it Pumpkin spice as I was inspired to use some orange eyeshadow from Bare Minerals that I had hardly touched.
I love this, and it's a great alternative to taupe's and browns for a neutral every day look.


New video makeup tutorial Miley Cyris wrecking ball!

Tuesday, 1 October 2013

She may not be everyone's favorite gal, and even less so idol or role model, but I wanted to create her pretty makeup look, don't worry I don't hop into my white y fronts and swing around.
It's very simple, and very classic to wear a bold red lip, a flawless pale face and black liquid eyeliner. It does make her blue eyes pop!


Sweater Weather Makeup Tutorial

Cosy up guys and gals!
It's my first autumnal makeup tutorial...
I called it Sweater Weather, I was wearing a sweater, or a jumper as we call them in England. Plus it also just so happens to be the makeup look that I have been wearing for a little while now.
It's nothing too crazy, just easy, breezy loveliness

And a lil' bit of country music to set the mood!


Back to School Makeup - Discreetly cover spots, blemishes, imperfections and acne!

Thursday, 22 August 2013

There are a lot of beautiful back to school makeup looks floating around the internet (is it weird I hate talking about 'back to school' even though I no longer go to school! It just makes me feel gloomy and like Summer is over!)
Anywho, as I was saying. There are a lot of wonderful makeup looks on Youtube that are titled 'back to school' or 'great teen school makeup' or other variations on those titles. But if your school is anything like mine then makeup was a big fat NO NO. To get caught with makeup on was a complete sin worthy of death as a punishment (or so it felt) So while all these beautiful quick back to school looks might be okay for some school policies, not mine. And maybe not yours too.
I've been plagued with spots and blemishes since what felt like time began, although it was probably when I turned around 13. Eyeliner and mascara can wait, I just want to cover those spots up!
Here's how I did it, I tried and tested it for 3+ years and not once did my school catch me. The tip here is less is more and not to cover the whole face, target the individual spots directly.
Also, this is great for boys who want to wear a little discreet cover up too, my tip would be to apply it in front of a window with a mirror so that you can see exactly how it looks in natural light and to other people.
The key here is subtle, subtle subtle. I feel like this is almost a SECRET makeup tutorial that I'm only sharing with a select few!

Just to reiterate...
I use the following: 
Collection 2000 Concealer Lasting Perfection and I am using shade Light! It retails for £3.99 from Superdrug
I'm using loose finishing powder from Bare Minerals, but this is the optional step!

Get your liner on! NYX Super Fat Eye Marker Review & First impressions

Sunday, 18 August 2013

My trusty liquid liner from Collection 2000 has served me well but there comes a point where the point (haha) of the brush can take no more.
Gone are the days where I can create lines as thin as a pin point, instead I can only create chunky looks with that little thing.
I decided it was about time I found a suitable replacement in the meantime to create those neat flicks.
I visited a beauty outlet store near me and bought the Super Fat eye marker by NYX 'The bold and daring liner' in Carbon Black.


 'Fat' and 'Bold' aren't words you would  associate with creating delicate lines, but this has a ultra fine tip that I hope I do not wear down before long.


Eye marker pens are perfect if:
You are a beginner at eyeliner as they are easier to use and feel familiar in your hand, like holding a pen
You like to create thick and thin eyeliner looks
You like to use eyeliner when applying false lashes to 'fill in' gaps and make the lashes look natural

My first impressions of this liner is that it's a very thin formula, much like a felt tip pen so it may not be the 'blackest' black you have ever used, but is black enough and more forgiving than thicker fomulas.
It dries incredibly quickly, basically instantly, so that you can blink without having a black-blob-disaster. Although, it is not waterproof (nor does it claim to be) or 'rub proof' and I'm a big eye rubber


Best to bring makeup for touch ups with this one!

Bridesmaid and Bridal Lip Colours for Summer Weddings

Monday, 12 August 2013

I have just been one of three bridesmaids for my sisters beautiful wedding, a hot topic among us different coloured bridesmaids was an appropriate lip colour for the occasion that would suit us all. My coloring is fair, bridesmaid #2 is also fair but with even paler skin than my own and slightly darker hair, whereas bridesmaid #3 has very dark hair, chocolate button eyes and fair skin.

We decided that it wasn't necessary to look like complete clones of each other when it came to lip colour and it would be better that we tailored our colours to ourselves to look good, rather than a 'one size fits all' that would look 'okay'

For us, red lips and dark lips were a straight up no no...
This is the products we chose from instead, like a lucky dip for lips!

 Here is my artistic angle of the lip products in their tubes, which to be frank is a bit misleading to the colours inside, so I've done a little swatch down here for you too so that you can follow.


The swatches are in the same order as the lip colours in their tubes above
From left to right:
Revlon Just Bitten Balm stain in Honey
MAC lipstick in Lovelorn (what I wore on the day)
Maybelline lipstick in Ultimate Blush
Bare Escentuals Buxom gloss in Kanini
Estee Lauder Pure Colour Lipstick in Crystal Baby
Estee Lauder Pure Colour Lipstick in Pinkberry

The favorites were the Estee Lauders which are truly creamy beautiful colours that are perfect to layer under a gloss. I hand chose these lip colours for their 'Your lips but better' properties that didn't make the lips striking, but made them a wonderful compliment to the rest of the face. The image of 'you but better' is exactly what a bride wants, not to look like a totally different person, but to look like a better version of themselves!

Cheers to kissable lip colours!

Maid of Honour Makeup - Summer Wedding!

Sunday, 11 August 2013

I did a few 'practices' of makeup for my sisters wedding this month, which I think is a good idea. I recommend taking a picture too to check that you like how it looks under flash photography. After all, pictures will be the only reminder left of the day so you want to look hawt!

My first trial looked something like this:

I knew that I wanted a very neutral eye and a pinky lip, I ended up using just two eyeshadows, Shroom all over the eyelid and up to the brow bone, and then Folie very gently added to the crease. Then I used a brown eyeliner on the water line for the outer half, and a white eyeliner on the inner half of the waterline. Of course mascara too. On my lips I'm wearing Revlon Lip balm pencil in shade Honey. At this point blusher etc was miscellaneous, and I can see here that my foundation is too light under photography flashes in comparison to my neck.


Here I've made a few revisions! I've got highlighting powder on, eye products are virtually the same and the lipstick I changed to Lovelorn by Mac which I prefer! I think that it gave a more 'pretty' look and made my eyes pop a little more!

The end result is something I'll create a makeup tutorial for you guys to follow, I was wearing a hell of a lot of makeup, but it stayed all day and disguised my blemished skin.
For now, I present to you the pdf that I created for the bridesmaids to follow: